How to build a blog like this one in 45 minutes
For a while I’d been wondering about the best way to publish articles and give my projects some visibility. GitHub? LinkedIn? Medium? Each one has its purpose, but something seemed to be missing: a home base for all of it.
The idea of having my own site wasn’t exactly new, but I was put off by the thought of building a whole HTML, CSS, and JS layout from scratch, not to mention the time I’d have to sink into maintenance.
I talked it over with a friend, who pointed me to a couple of great tools that addressed exactly my pain point (thanks, Cleyson!). The idea is to use the https://hexo.io/ + https://www.netlify.com/ combo.
With these two tools, I built, edited, customized, and published this blog in 45 minutes.
What is Hexo?
Hexo is a full-featured, simple, and fast blog framework built on Node.js. You can also enable a wide range of plugins, themes, and APIs. It has complete, straightforward documentation (https://hexo.io/docs/) and lots of themes to choose from (https://hexo.io/themes/).
What is Netlify?
Netlify is, among many other things, a tool for publishing your site and setting up continuous deployment from your repository. The service also lets you buy a domain, or you can stay on the free plan with a netlify subdomain.
Getting started
1. Hexo
- Install Node.js
- Install Git (optional)
- Run the command > npm install -g hexo-cli
- Cmd > D:\MinhaPastas\MeuBlogSite
- Cmd > hexo init D:\MinhaPastas\MeuBlogSite
- Cmd > npm install
At this point you can already see the basic, working structure of the blog in the folder you chose.
Now you need to pick and apply a theme. In the themes section (https://hexo.io/themes/), choose one and copy the link to its GitHub repository.
Using the Geek theme as an example:
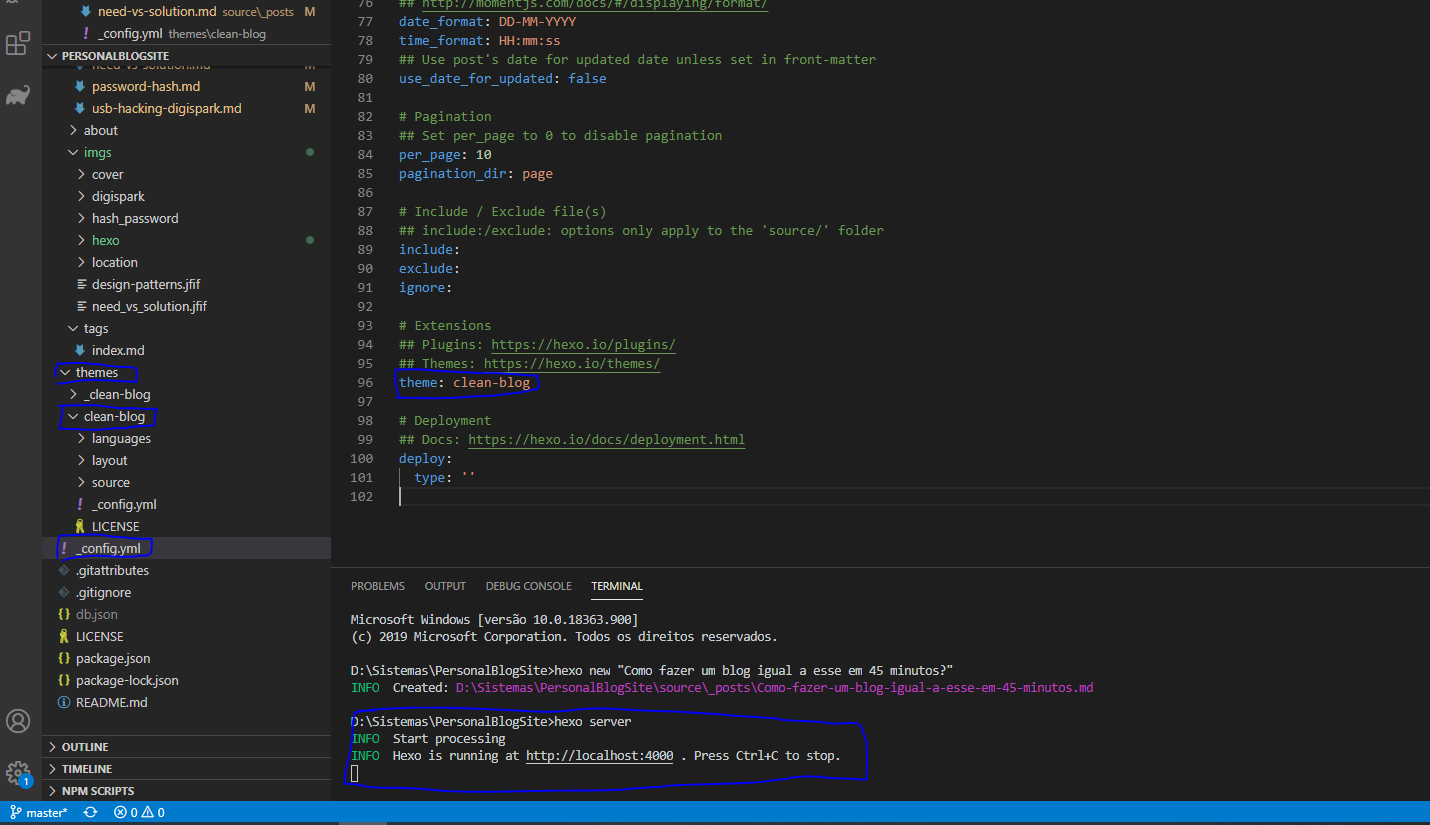
- Create a folder for the theme inside the existing themes folder
- Example: D:\Sistemas\PersonalBlogSite\themes\geek
- Copy the theme > Cmd > “D:\Sistemas\PersonalBlogSite\themes\geek“ > git clone https://github.com/sanjinhub/hexo-theme-geek.git geek.
- Change the ‘theme‘ property in ‘_config.yml‘ to ‘geek‘
- Run to test > hexo server
- Run to create new posts > hexo new “This is a new post”
Themes come with plenty of settings and customization options. Explore them to tailor the theme to your needs.
2. Repository
Pick a repository host of your choice and publish the blog files there. I chose GitHub and made the repository public, in case you want to look at any of the properties or settings I configured.
3. Netlify
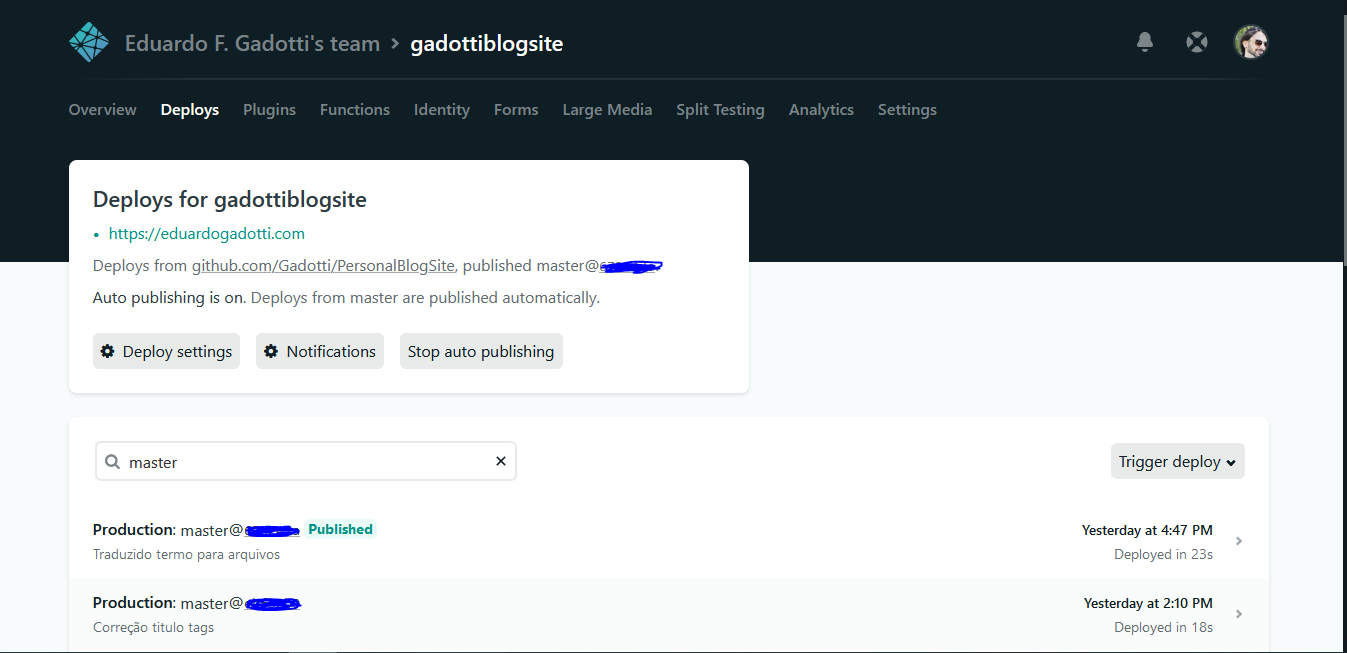
This is where the site gets deployed and published. The integration service has a basic free plan that covers everything we need here.
The step-by-step setup is self-explanatory and very easy to follow. Just grant the necessary permissions to your repository, and the main settings are configured automatically.
The site will be set up with continuous deployment, which means that every time you push to your repository, a new deploy runs automatically, and your new article goes live without any extra steps on your part.
Conclusion
It’s a great option for speeding up the development of your own site, without being held hostage by services like WordPress or Medium, where customization has limits.
I also love being able to switch themes whenever I want, just as easily.
For all the convenience and abstraction, the entire codebase is still at your disposal, so you can change anything you want. It’s still 100% customizable.